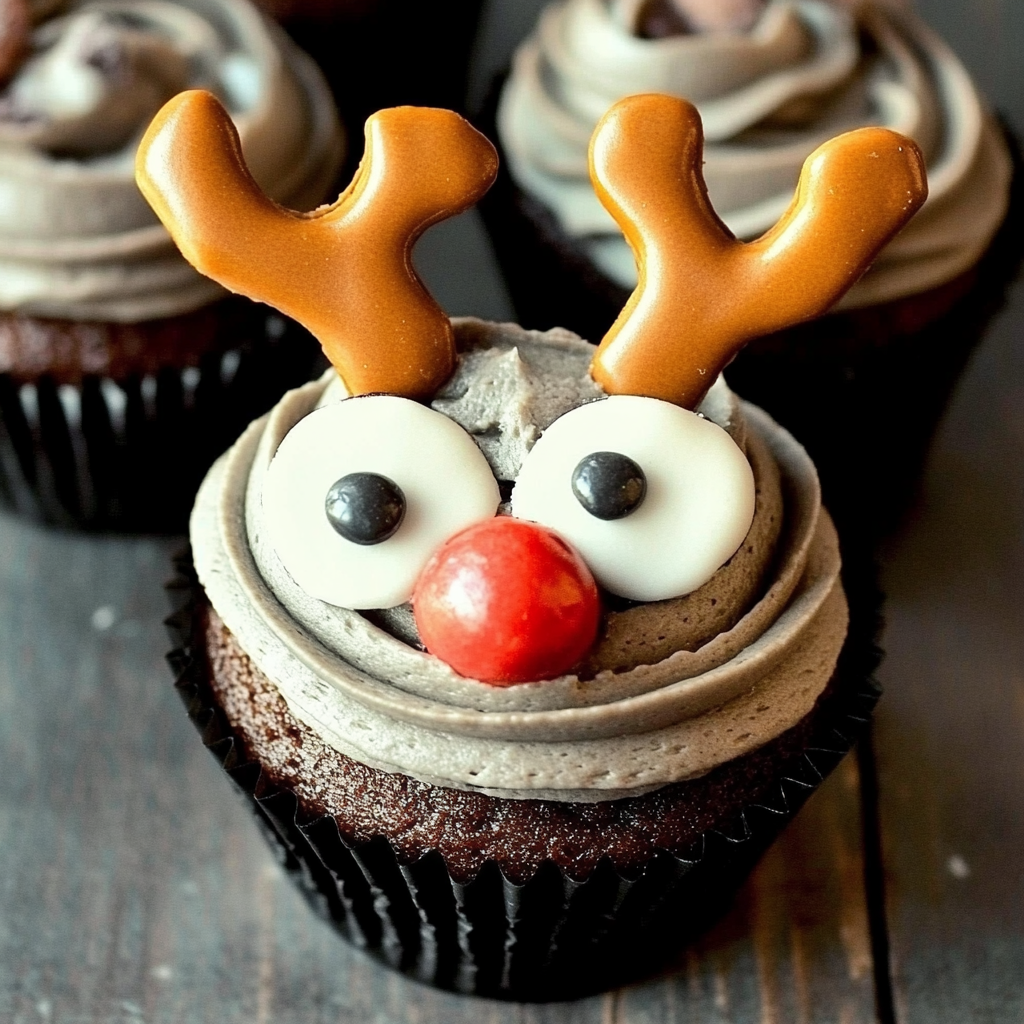
Reindeer cupcakes are a delightful and festive treat perfect for holiday gatherings. These adorable cupcakes are decorated to resemble cheerful reindeer, making them a hit with kids and adults alike. Not only are they fun to create, but they also add a whimsical touch to your dessert table. Here’s how to make them!
Ingredients
For the Cupcakes:
- 1 ½ cups all-purpose flour
- 1 cup granulated sugar
- ½ cup unsalted butter, softened
- 2 large eggs
- ½ cup whole milk
- 1 teaspoon vanilla extract
- 1 ½ teaspoons baking powder
- ¼ teaspoon salt
For the Frosting:
- 1 cup unsalted butter, softened
- 3 cups powdered sugar
- 2–3 tablespoons milk (adjust for consistency)
- 1 teaspoon vanilla extract
- Brown food coloring
For Decoration:
- Mini pretzels (for antlers)
- Red candy (like M&M’s, for the nose)
- Candy eyes
- Chocolate chips (optional, for extra decoration)
Instructions
Make the Cupcakes:
- Preheat your oven to 350°F (175°C) and line a muffin tin with cupcake liners.
- In a large mixing bowl, cream the softened butter and sugar until light and fluffy.
- Add the eggs one at a time, mixing well after each addition. Stir in the vanilla extract.
- In a separate bowl, whisk together the flour, baking powder, and salt.
- Gradually add the dry ingredients to the wet mixture, alternating with the milk, starting and ending with the dry ingredients. Mix until just combined.
- Spoon the batter into the cupcake liners, filling each about 2/3 full.
- Bake for 18–20 minutes, or until a toothpick inserted into the center comes out clean. Let the cupcakes cool completely.
Prepare the Frosting:
- In a large bowl, beat the butter until creamy.
- Gradually add the powdered sugar, one cup at a time, mixing well between additions.
- Stir in the vanilla extract and add milk a tablespoon at a time until the frosting reaches your desired consistency.
- Add brown food coloring to achieve a reindeer-like hue.
Decorate the Cupcakes:
- Frost the cooled cupcakes with the brown frosting, smoothing it with an offset spatula.
- Add two mini pretzels at the top of each cupcake for antlers.
- Place candy eyes just below the antlers.
- Add a red candy in the center for the reindeer’s nose.
- Optional: Use chocolate chips to add extra details like spots or a smile.
Serving and Storage Tips
Serve these reindeer cupcakes at room temperature. They pair well with a glass of milk or a hot cup of cocoa for the ultimate festive treat. If you have leftovers, store them in an airtight container at room temperature for up to 2 days or refrigerate for up to 4 days. Bring them to room temperature before serving to enjoy their best flavor and texture.
FAQs
1. Can I use a boxed cake mix for the cupcakes?
Yes, a boxed cake mix can save time and works well. Simply follow the instructions on the box for preparing the batter.
2. What other candies can I use for the nose?
You can use gumdrops, jelly beans, or even small round chocolates instead of red M&M’s for the nose.
3. Can I make these cupcakes ahead of time?
Yes, you can bake the cupcakes a day in advance and store them covered. Decorate them on the day of serving for the freshest appearance.
4. Are there gluten-free options for this recipe?
Absolutely! Replace the all-purpose flour with a gluten-free flour blend and ensure that the other ingredients, like the pretzels, are gluten-free as well.
Enjoy making these Reindeer Cupcakes and spreading holiday cheer with this sweet and festive dessert!
PrintThe Reindeer Cupcakes
Reindeer Cupcakes are a delightful and festive treat, perfect for holiday gatherings. These chocolate cupcakes are decorated to resemble reindeer, complete with pretzel antlers, candy eyes, and red noses. They’re as fun to make as they are to eat!
Ingredients
For the Cupcakes:
- 1 box devil’s food cake mix
- 3 large eggs
- 1/2 cup vegetable oil
- 3/4 cup water
- 1/2 cup sour cream
For the Chocolate Frosting:
- 1 cup unsalted butter, softened
- 3 cups powdered sugar
- 1/2 cup unsweetened cocoa powder
- 3 tablespoons heavy whipping cream
- 1 teaspoon vanilla extract
- Pinch of salt
For Decoration:
- 24 mini pretzel twists (for antlers)
- 12 vanilla wafer cookies (for muzzles)
- 12 red M&M’s or red candies (for noses)
- 24 candy eyes
Instructions
- Prepare the Cupcakes:
- Preheat your oven to 325°F (165°C). Line a 12-cup muffin tin with cupcake liners.
- In a large mixing bowl, combine the devil’s food cake mix, eggs, vegetable oil, water, and sour cream. Mix until smooth and well combined.
- Fill each cupcake liner about 3/4 full with the batter.
- Bake for 20-25 minutes, or until a toothpick inserted into the center comes out clean.
- Remove from the oven and allow the cupcakes to cool completely on a wire rack before decorating.
- Prepare the Chocolate Frosting:
- In a large bowl, beat the softened butter until creamy (about 3 minutes).
- Gradually add the powdered sugar and cocoa powder, mixing on low speed until combined.
- Add the heavy whipping cream, vanilla extract, and a pinch of salt. Increase the speed to high and beat for an additional 3 minutes until the frosting is light and fluffy.
- Decorate the Cupcakes:
- Spread or pipe a generous amount of chocolate frosting onto each cooled cupcake.
- Place two mini pretzel twists at the top of each cupcake to represent the reindeer’s antlers.
- Position a vanilla wafer cookie below the center of each cupcake to form the muzzle.
- Attach a red M&M or red candy to the vanilla wafer using a small dab of frosting to create the reindeer’s nose.
- Place two candy eyes above the muzzle on each cupcake.
Notes
- Ensure the cupcakes are completely cooled before decorating to prevent the frosting from melting.
- Store the decorated cupcakes in an airtight container at room temperature for up to 2 days, or refrigerate for up to 4 days.

