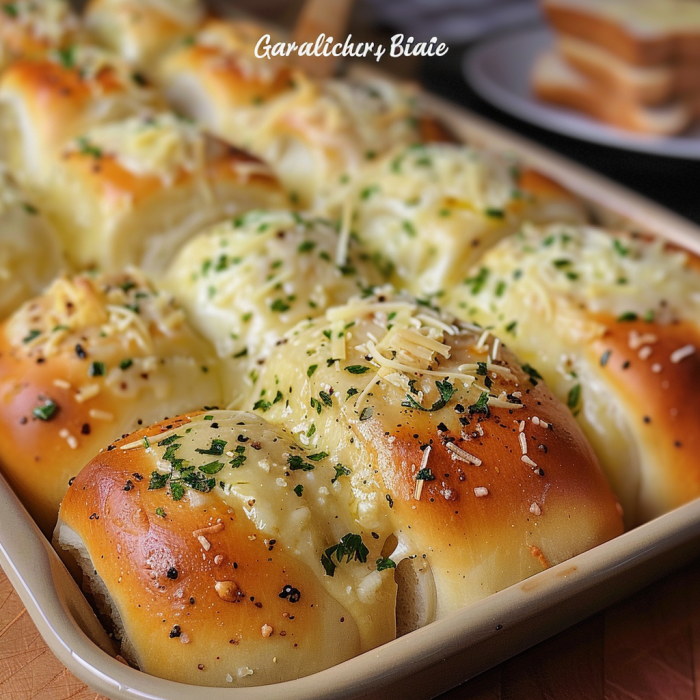
Are you ready to elevate your garlic bread game? Look no further than this mouthwatering Hawaiian Roll Garlic Bread recipe. Combining the sweet and fluffy goodness of Hawaiian rolls with the savory punch of garlic butter, this dish is perfect for any meal or occasion. Let’s dive into how you can make this delectable bread that’s sure to impress your family and friends!
Why You’ll Love Hawaiian Roll Garlic Bread
- Unique Flavor Fusion: The Hawaiian rolls bring a subtle sweetness that beautifully contrasts with the robust garlic butter. This blend of flavors creates a unique and delightful taste experience.
- Quick and Easy: With just a few ingredients and simple steps, this recipe is incredibly easy to make. Whether you’re a novice cook or an experienced chef, you’ll find it straightforward and satisfying.
- Versatile: Hawaiian Roll Garlic Bread can be served as a side dish, appetizer, or even as a standalone snack. It pairs perfectly with pasta, soups, and salads or can be enjoyed on its own.
- Perfect for Any Occasion: Whether you’re hosting a casual family dinner, a holiday gathering, or a weekend barbecue, this garlic bread will be a crowd-pleaser.
Ingredients
- 12 Hawaiian rolls (pre-sliced or whole)
- 1/2 cup unsalted butter, melted
- 3-4 cloves garlic, minced
- 2 tablespoons fresh parsley, chopped
- 1/4 cup grated Parmesan cheese (optional)
- Salt and pepper to taste
Instructions
- Preheat Your Oven: Set your oven to 375°F (190°C) to get it ready for baking.
- Prepare the Garlic Butter: In a mixing bowl, combine the melted butter, minced garlic, and chopped parsley. If you like a cheesy kick, add in the grated Parmesan cheese. Season with salt and pepper to taste.
- Assemble the Rolls: If using whole Hawaiian rolls, slice them in half horizontally. Place the rolls on a baking sheet lined with parchment paper. If your rolls are pre-sliced, simply lay them out on the baking sheet.
- Brush with Garlic Butter: Generously brush the garlic butter mixture onto the cut sides of the rolls. Make sure each roll is well-coated for maximum flavor.
- Bake to Perfection: Bake in the preheated oven for about 10-12 minutes or until the edges are golden brown and the garlic butter has been absorbed into the rolls. For an extra crispy top, you can broil them for an additional 1-2 minutes, but watch carefully to avoid burning.
- Serve and Enjoy: Remove from the oven and let cool for a few minutes before serving. Enjoy warm, and watch as this delightful bread disappears quickly!
Tips for the Best Hawaiian Roll Garlic Bread
- Fresh Garlic: For the best flavor, use fresh garlic rather than garlic powder. It adds a robust, aromatic quality that enhances the overall taste.
- Butter Consistency: Make sure your butter is melted but not too hot to prevent it from burning the garlic.
- Customize Your Bread: Feel free to add other herbs like thyme or rosemary to the garlic butter for a personalized twist.
Serving and Storage Tips for Hawaiian Roll Garlic Bread
To ensure your Hawaiian Roll Garlic Bread is enjoyed to its fullest and remains fresh, here are some handy serving and storage tips:
Serving Tips
- Serve Warm: Hawaiian Roll Garlic Bread is best served warm. The heat helps the flavors meld together and gives the bread a delightful, soft texture. If you’re making it ahead of time, briefly reheat it in the oven before serving.
- Cut for Convenience: If you used whole rolls and sliced them before baking, serve them as individual pieces for easy snacking. If they’re pre-sliced, you can pull apart the slices or cut them into smaller pieces for a party or gathering.
- Pair with Dips: Complement your garlic bread with dips like marinara sauce, ranch, or a tangy vinaigrette. These can enhance the flavor and provide variety.
- Garnish for Extra Flair: Add a sprinkle of extra chopped parsley or a little more grated Parmesan on top just before serving for a fresh, flavorful touch.
- Use as a Side Dish: Hawaiian Roll Garlic Bread pairs excellently with dishes like pasta, soup, salads, or grilled meats. It’s versatile enough to complement various cuisines.
Storage Tips
- Cool Before Storing: Allow the garlic bread to cool to room temperature before storing. This helps prevent condensation and keeps the bread from becoming soggy.
- Airtight Container: Store the garlic bread in an airtight container or wrap it tightly in plastic wrap or aluminum foil. This helps maintain its freshness and prevents it from drying out.
- Refrigeration: If you plan to keep the bread for more than a couple of days, it’s best to refrigerate it. Hawaiian Roll Garlic Bread can be stored in the fridge for up to 5 days.
- Freezing for Long-Term Storage: For longer storage, you can freeze the garlic bread. Wrap it tightly in plastic wrap and then in aluminum foil to protect it from freezer burn. It can be frozen for up to 3 months. To reheat, thaw it overnight in the fridge and warm it in the oven at 375°F (190°C) until heated through.
- Reheating: To revive the garlic bread’s crispy texture, reheat it in the oven at 375°F (190°C) for about 5-10 minutes. If reheating frozen bread, let it thaw first, then bake.
By following these serving and storage tips, you can ensure that your Hawaiian Roll Garlic Bread stays delicious and fresh, making it the perfect addition to any meal or gathering. Enjoy every flavorful bite!
1. Can I use regular bread instead of Hawaiian rolls?
Yes, you can substitute Hawaiian rolls with regular bread if needed. However, Hawaiian rolls add a unique sweetness that pairs exceptionally well with the garlic butter. If using regular bread, consider adjusting the amount of butter and garlic to suit your taste.
2. Can I make Hawaiian Roll Garlic Bread ahead of time?
Absolutely! You can prepare the garlic bread ahead of time by assembling it and refrigerating it until you’re ready to bake. If you prefer, you can bake it in advance and reheat it just before serving. To reheat, place it in a preheated oven at 375°F (190°C) for about 5-10 minutes until warmed through.
3. How can I make this recipe dairy-free?
To make Hawaiian Roll Garlic Bread dairy-free, substitute the unsalted butter with a dairy-free alternative, such as margarine or a plant-based butter. Additionally, use a dairy-free Parmesan cheese or omit it altogether. Ensure the Hawaiian rolls you use are also dairy-free, or make your own.
4. Can I add other toppings to the garlic bread?
Yes, you can customize your Hawaiian Roll Garlic Bread with various toppings. Consider adding sliced jalapeños for a spicy kick, chopped sun-dried tomatoes for extra flavor, or a sprinkle of your favorite herbs like thyme or rosemary. Experiment with different ingredients to create your own delicious variations!