If you’re a fan of peanut butter, then Homemade Nutter Butter Cookies are a must-try treat. These delightful cookies are a fun and tasty homemade version of the popular store-bought Nutter Butter cookies. With their rich peanut butter flavor and smooth, creamy filling, they’re sure to become a favorite in your cookie repertoire. Here’s a step-by-step guide to making these delectable cookies from scratch.
Ingredients
For the Cookies:
- 1 cup creamy peanut butter
- 1 cup granulated sugar
- 1 large egg
- 1 teaspoon vanilla extract
- 1/2 teaspoon baking powder
- 1/4 teaspoon salt
For the Filling:
- 1/2 cup creamy peanut butter
- 1/2 cup powdered sugar
- 1 tablespoon unsalted butter, softened
- 1/4 teaspoon vanilla extract
Instructions
1. Preheat the Oven
Preheat your oven to 350°F (175°C). Line a baking sheet with parchment paper or a silicone baking mat to prevent the cookies from sticking.
2. Make the Cookie Dough
In a large mixing bowl, combine the creamy peanut butter and granulated sugar. Mix until smooth. Add the egg, vanilla extract, baking powder, and salt, and stir until fully incorporated. The dough should be thick and slightly sticky.
3. Shape the Cookies
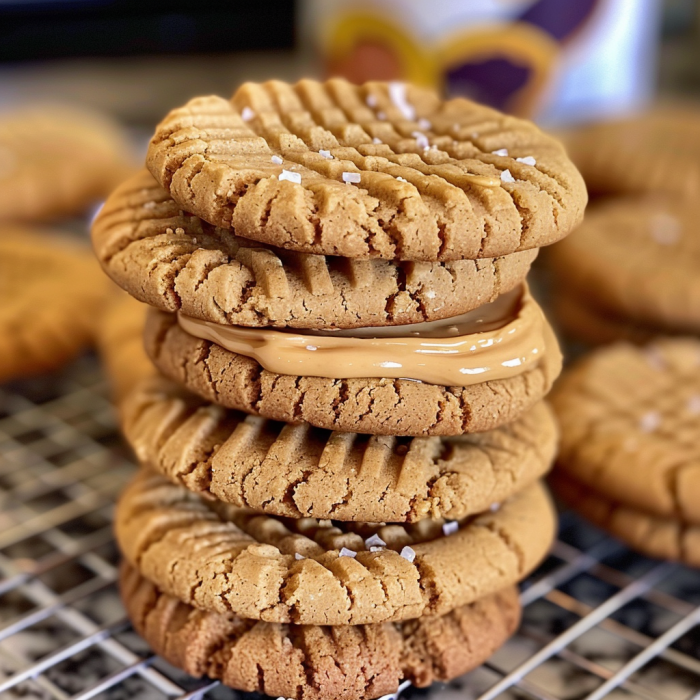
Using a small cookie scoop or tablespoon, drop rounded balls of dough onto the prepared baking sheet. Flatten each ball with a fork to create a crisscross pattern, similar to classic peanut butter cookies. Leave some space between each cookie as they will spread slightly while baking.
4. Bake the Cookies
Bake in the preheated oven for 10-12 minutes, or until the edges are lightly golden. The centers may look slightly underbaked, but they will firm up as they cool. Allow the cookies to cool on the baking sheet for 5 minutes before transferring them to a wire rack to cool completely.
5. Prepare the Filling
While the cookies are cooling, prepare the filling. In a medium bowl, beat together the creamy peanut butter, powdered sugar, softened butter, and vanilla extract until smooth and creamy.
6. Assemble the Cookies
Once the cookies are completely cool, spread a generous amount of the peanut butter filling on the bottom side of one cookie. Top with another cookie, bottom side down, to create a sandwich. Press gently to secure.
Tips for Perfect Nutter Butter Cookies
- Use Room Temperature Ingredients: For the best texture, ensure that your butter and peanut butter are at room temperature before mixing.
- Chill the Dough: If the dough is too sticky to handle, chill it in the refrigerator for about 30 minutes before shaping the cookies.
- Customize Your Filling: Feel free to add a pinch of salt or a dash of cinnamon to the filling for extra flavor.
Why You’ll Love Homemade Nutter Butter Cookies
These Homemade Nutter Butter Cookies offer several advantages over their store-bought counterparts:
- Freshness: There’s nothing quite like the taste of freshly baked cookies. Homemade Nutter Butter Cookies are soft, chewy, and packed with flavor.
- Customization: Making them at home allows you to control the sweetness and adjust the ingredients to suit your taste preferences.
- No Preservatives: Homemade cookies are free from artificial preservatives and additives found in many packaged cookies.
Conclusion
Homemade Nutter Butter Cookies are a delightful treat that combines the rich, nutty flavor of peanut butter with a creamy, satisfying filling. Perfect for a sweet snack or as a special treat for family and friends, these cookies are sure to impress. With their easy-to-follow recipe and delicious results, they’re a wonderful addition to any baking lineup.
Serving and Storage Tips for Homemade Nutter Butter Cookies
Serving Tips
- Presentation: For an elegant touch, arrange the cookies on a decorative plate or platter. You can also stack them in a cookie jar or tin for a more casual presentation.
- Pairing: Homemade Nutter Butter Cookies pair wonderfully with a glass of milk or a cup of coffee. They’re also great with a dollop of whipped cream or a scoop of vanilla ice cream for an indulgent dessert.
- Portion Control: If you’re serving these cookies at a party or gathering, consider cutting them in half or into smaller bite-sized pieces to allow guests to enjoy a variety of treats without overindulging.
- Temperature: Serve the cookies at room temperature for the best texture and flavor. If you prefer a warm cookie, you can briefly heat them in the microwave for about 10-15 seconds.
Storage Tips
- Airtight Container: Store your Homemade Nutter Butter Cookies in an airtight container to keep them fresh. This helps prevent them from becoming stale and preserves their soft texture.
- Layering: If you’re stacking the cookies in a container, place a sheet of parchment paper or wax paper between the layers to prevent them from sticking together.
- Room Temperature Storage: The cookies can be kept at room temperature for up to one week. Ensure they are stored in a cool, dry place away from direct sunlight or heat sources.
- Refrigeration: If you live in a particularly warm climate or want to extend the shelf life of your cookies, you can refrigerate them. They’ll stay fresh for up to two weeks when stored in the fridge.
- Freezing: For long-term storage, freeze the cookies. Place them in a single layer on a baking sheet to freeze solid, then transfer them to a freezer-safe bag or container. They can be stored in the freezer for up to three months. To enjoy, simply thaw at room temperature for a few hours before serving.
- Freezing Cookie Dough: If you want to bake fresh cookies on demand, you can freeze the cookie dough. Scoop the dough onto a baking sheet and freeze until solid, then transfer to a freezer-safe bag or container. When ready to bake, simply bake the frozen dough balls, adding an extra minute or two to the baking time.
By following these serving and storage tips, you can ensure that your Homemade Nutter Butter Cookies remain delicious and enjoyable for as long as possible. Whether you’re serving them immediately or saving them for later, these cookies are sure to be a hit!
1. Can I use crunchy peanut butter instead of creamy peanut butter for this recipe?
Yes, you can use crunchy peanut butter instead of creamy peanut butter if you prefer a bit more texture in your cookies. Keep in mind that using crunchy peanut butter may slightly alter the texture of the cookies and can make them a bit more crumbly.
2. How can I make these cookies gluten-free?
To make gluten-free Homemade Nutter Butter Cookies, substitute the granulated sugar with a gluten-free sugar blend and ensure that all other ingredients are certified gluten-free. The recipe primarily relies on peanut butter and does not include flour, so it’s naturally gluten-free as long as the other ingredients are gluten-free.
3. Can I freeze the filling for later use?
Yes, you can freeze the peanut butter filling. To do this, place the filling in an airtight container or freezer-safe bag, and freeze it for up to three months. When you’re ready to use it, let it thaw in the refrigerator and then re-whip it if necessary to restore its creamy texture before spreading it between the cookies.
4. How can I prevent the cookies from spreading too much while baking?
To prevent the cookies from spreading too much, make sure to chill the dough for about 30 minutes before baking. This helps the dough hold its shape better during baking. Additionally, using parchment paper or a silicone baking mat can help prevent spreading and sticking. If the dough is too soft, consider chilling it for a bit longer before baking.