Introduction
Craving a crunchy snack that’s both satisfying and customizable? Homemade potato crisps are the perfect solution! With just a few simple ingredients and a bit of time, you can create delicious, crispy potato chips right in your kitchen. This recipe is not only easy to follow but also allows you to experiment with different seasonings to suit your taste. Read on to discover how to make the perfect homemade potato crisps!
Ingredients
- 4 large russet potatoes
- 2 tablespoons olive oil
- 1 teaspoon salt (or to taste)
- 1/2 teaspoon black pepper (optional)
- 1/2 teaspoon paprika (optional)
- 1/2 teaspoon garlic powder (optional)
- 1/2 teaspoon onion powder (optional)
Instructions

1. Preheat the Oven
Start by preheating your oven to 400°F (200°C). A hot oven ensures that your potato crisps will bake evenly and become nice and crispy.
2. Prepare the Potatoes
- Wash and Peel: Wash the potatoes thoroughly. Peel them if desired, although leaving the skins on can add extra crunch and flavor.
- Slice: Using a mandolin slicer or a sharp knife, slice the potatoes as thinly as possible. Aim for slices that are about 1/16 inch thick. Thin slices are key to achieving a crisp texture.
3. Soak the Potato Slices
- Soak: Place the potato slices in a large bowl of cold water. Let them soak for at least 30 minutes. This step removes excess starch and helps the crisps become crispier.
- Dry: After soaking, drain the water and pat the potato slices dry using a clean kitchen towel or paper towels.
4. Season and Oil
- Toss: In a large bowl, toss the potato slices with olive oil. Ensure each slice is evenly coated.
- Season: Add salt and any additional seasonings you prefer, such as black pepper, paprika, garlic powder, or onion powder. Toss again to distribute the seasonings evenly.
5. Arrange on a Baking Sheet
- Line: Line a baking sheet with parchment paper or a silicone baking mat. This prevents the crisps from sticking and makes cleanup easier.
- Arrange: Lay the potato slices in a single layer on the baking sheet. Avoid overlapping the slices to ensure they cook evenly.
6. Bake the Crisps
- Bake: Place the baking sheet in the preheated oven. Bake for 15-20 minutes, or until the potato slices are golden brown and crispy. Keep an eye on them, as they can burn quickly towards the end.
- Flip: For even crispiness, flip the potato slices halfway through the baking time.
7. Cool and Enjoy
- Cool: Once baked, remove the crisps from the oven and let them cool on a wire rack. This helps them stay crisp.
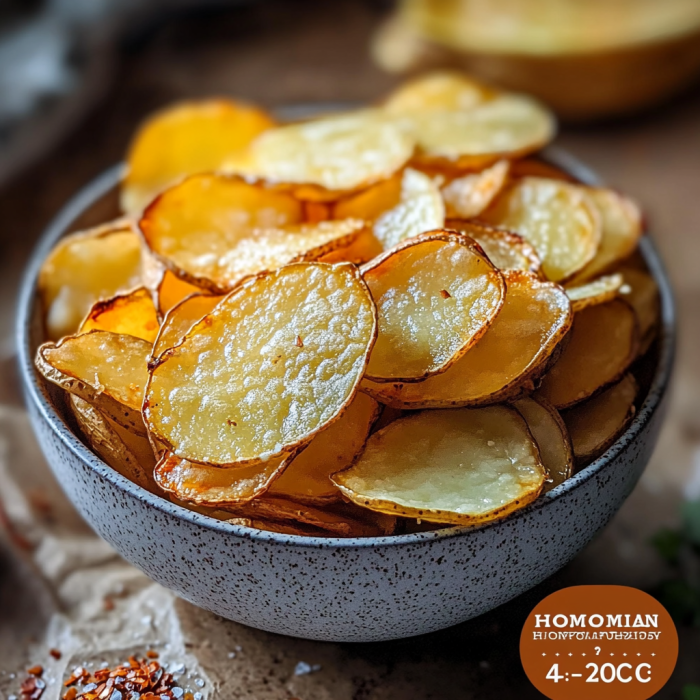
- Serve: Enjoy your homemade potato crisps as a snack on their own or with your favorite dip!
Tips for Perfect Potato Crisps
- Thickness Matters: Thin slices are crucial for achieving a crisp texture. Use a mandolin slicer for consistent results.
- Soaking: Don’t skip the soaking step. It’s essential for removing excess starch and ensuring crispiness.
- Seasoning: Feel free to get creative with your seasonings. Try different herbs, spices, or even cheese powders to make your crisps unique.
Conclusion
Making homemade potato crisps is a fun and rewarding process that yields a deliciously crunchy snack. With just a few ingredients and some simple steps, you can create a batch of crispy potato chips that are perfect for any occasion. Whether you’re hosting a party, enjoying a movie night, or just craving a tasty treat, these homemade potato crisps are sure to satisfy. Give this recipe a try, and you’ll never go back to store-bought chips again!
Serving and Storage Tips for Homemade Potato Crisps
Serving Tips:
- Fresh and Hot: Homemade potato crisps are best enjoyed fresh and hot out of the oven. They maintain their crispiness and flavor when served immediately.
- Presentation: Serve your crisps in a bowl or on a platter for an appealing presentation. For an added touch, garnish with a sprinkle of sea salt or your favorite seasoning blend.
- Dips and Accompaniments: Complement your crisps with dips such as salsa, guacamole, sour cream, or a creamy dip of your choice. They also pair well with sandwiches, burgers, or as part of a party platter.
- Portion Control: To keep the crisps from getting soggy, avoid placing them in a covered container until they have cooled completely. This helps maintain their crispiness.
Storage Tips:
- Cooling: Allow the crisps to cool completely on a wire rack before storing. This prevents condensation from forming inside the container, which can make the crisps soggy.
- Airtight Container: Store the cooled crisps in an airtight container to keep them fresh. A resealable plastic bag or a glass jar with a tight-fitting lid works well.
- Room Temperature: Homemade potato crisps can be stored at room temperature for up to one week. Keep them in a cool, dry place away from direct sunlight.
- Recrisping: If your crisps lose their crunch over time, you can recrisp them in the oven. Preheat the oven to 350°F (175°C) and bake the crisps for about 5-10 minutes, or until they are crispy again.
- Avoid Refrigeration: Do not store potato crisps in the refrigerator, as this can lead to moisture buildup and loss of crispiness.
By following these serving and storage tips, you can ensure that your homemade potato crisps stay delicious and crispy for as long as possible!
1. Can I use any type of potato for this recipe?
Answer: While you can use different types of potatoes, russet potatoes are the best choice for homemade crisps. They have a high starch content, which helps achieve a crispier texture. Other types, like red or Yukon gold potatoes, may not crisp up as well.
2. How can I make sure my potato slices are evenly crispy?
Answer: To ensure even crispiness, slice your potatoes as uniformly as possible. Using a mandolin slicer is highly recommended for consistent thickness. Also, make sure to arrange the slices in a single layer on the baking sheet and avoid overlapping them.
3. Can I make these crisps ahead of time?
Answer: Yes, you can make homemade potato crisps ahead of time. Store them in an airtight container at room temperature for up to one week. For the best results, allow them to cool completely before sealing them in the container.
4. How can I adjust the seasoning for different flavor profiles?
Answer: Feel free to experiment with different seasonings to suit your taste. For example, you can add cayenne pepper for a spicy kick, dill for a herby flavor, or Parmesan cheese for a cheesy twist. Mix the seasonings with the salt before tossing them with the potato slices for even distribution.