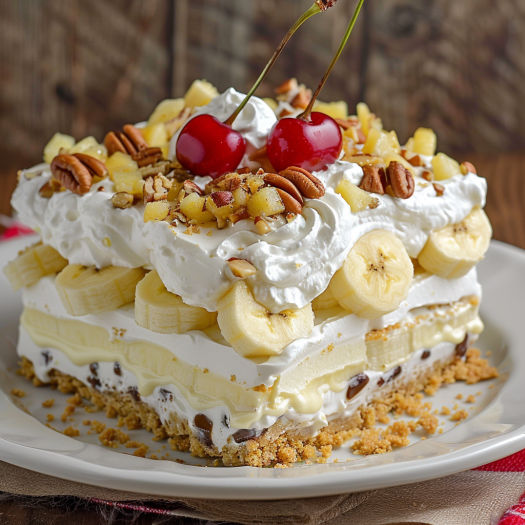
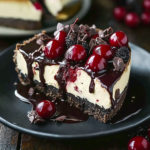
Are you craving something sweet, cool, and indulgent but dread turning on the oven? Look no further than this delightful No-Bake Banana Split Cake recipe! Perfect for those warm summer days or whenever you want a refreshing treat without the hassle of baking. Let’s dive into this simple yet scrumptious recipe that brings all the flavors of a classic banana split into a convenient cake form.
Ingredients:
- 2 cups crushed graham crackers
- 1/2 cup unsalted butter, melted
- 1 cup powdered sugar
- 1 package (8 ounces) cream cheese, softened
- 1 can (20 ounces) crushed pineapple, drained
- 2 large bananas, sliced
- 1 container (8 ounces) frozen whipped topping, thawed
- Maraschino cherries and chocolate syrup for garnish
Instructions:
- Prepare the Crust:
- In a bowl, combine the crushed graham crackers and melted butter until well mixed.
- Press the mixture into the bottom of a 9×13-inch pan to form the crust. Place it in the refrigerator to chill while you prepare the filling.
- Make the Filling:
- In another bowl, beat together the powdered sugar and cream cheese until smooth and creamy.
- Spread this mixture evenly over the chilled graham cracker crust.
- Layer the Goodness:
- Arrange the sliced bananas over the cream cheese layer.
- Spread the drained crushed pineapple over the bananas.
- Finish Strong:
- Top the cake with the thawed whipped topping, spreading it evenly to cover the entire surface.
- Garnish with maraschino cherries and a drizzle of chocolate syrup for that classic banana split flair.
- Chill and Serve:
- Refrigerate the cake for at least 4 hours or until set.
- Slice and serve chilled, and enjoy the creamy, fruity goodness of your No-Bake Banana Split Cake!
Why You’ll Love This Recipe:
- No-Bake Convenience: With no need to turn on the oven, this recipe saves you time and keeps your kitchen cool, making it perfect for hot summer days.
- Classic Flavor Fusion: Indulge in the nostalgic flavors of a traditional banana split in a convenient cake form. It’s like enjoying your favorite dessert with a twist!
- Simple Ingredients, Big Taste: With just a handful of readily available ingredients, you can whip up a dessert that’s sure to impress without the fuss.
- Customizable and Fun: Get creative with your toppings! Add nuts, sprinkles, or even extra fruit to tailor this cake to your taste preferences or to suit any occasion.
So, the next time you’re craving the deliciousness of a banana split but want something easy and oven-free, give this No-Bake Banana Split Cake recipe a try. It’s a surefire way to satisfy your sweet tooth with minimal effort.
Serving Tips:
- Chill Before Serving: For the best taste and texture, allow the No-Bake Banana Split Cake to chill in the refrigerator for at least 4 hours, or until set, before serving. This ensures that all the flavors meld together perfectly and the cake holds its shape when sliced.
- Garnish Creatively: Before serving, add a final touch of flair by garnishing the cake with additional maraschino cherries and a drizzle of chocolate syrup. This not only enhances the visual appeal but also adds extra indulgence to each slice.
- Slice with Care: When slicing the cake, use a sharp knife dipped in hot water and wiped dry between cuts for clean, neat slices. This prevents the layers from sticking to the knife and ensures each serving looks as beautiful as it tastes.
- Serve Chilled: Present the slices on chilled plates to keep the cake cool and refreshing until it’s enjoyed.
Storage Tips:
- Refrigerate Properly: After serving, store any leftover No-Bake Banana Split Cake covered in the refrigerator. Use an airtight container or tightly wrap the pan with plastic wrap to prevent the cake from absorbing any odors and to maintain its freshness.
- Consume Promptly: Enjoy the leftover cake within 2-3 days for the best taste and texture. While the cake will stay safe to eat for longer, the quality may begin to deteriorate over time.
- Freeze for Later: If you anticipate having leftovers that won’t be consumed within a few days, consider freezing individual slices of the cake. Wrap each slice tightly in plastic wrap and then aluminum foil before placing them in a freezer-safe container. Frozen slices can be enjoyed for up to 1-2 months. Simply thaw them in the refrigerator before serving.
By following these serving and storage tips, you can ensure that your No-Bake Banana Split Cake remains fresh, delicious, and ready to enjoy whenever the craving strikes. Whether it’s a special occasion or a casual dessert indulgence, this cake is sure to delight every time!
1. Can I substitute the graham crackers with another type of crust?
- Absolutely! While graham crackers provide a classic base for this cake, you can experiment with other options such as crushed vanilla wafers, chocolate cookies, or even a pre-made shortbread crust. Choose a crust that complements the flavors of the banana split for a delicious twist.
2. Can I use fresh whipped cream instead of frozen whipped topping?
- Yes, you can substitute frozen whipped topping with freshly whipped cream if you prefer. Simply whip heavy cream with a bit of sugar until stiff peaks form, then use it in place of the frozen whipped topping. Keep in mind that freshly whipped cream may not hold its shape as well as the frozen variety, so it’s best to assemble the cake shortly before serving.
3. Can I make this cake ahead of time for a party or gathering?
- Absolutely! In fact, this No-Bake Banana Split Cake is perfect for making ahead of time. You can prepare and assemble the cake up to 24 hours in advance, then simply cover it and refrigerate until you’re ready to serve. This makes it an ideal dessert option for entertaining, as it allows you to focus on other aspects of your gathering without worrying about last-minute preparation.
4. Can I add additional toppings or variations to this recipe?
- Definitely! Feel free to get creative with your toppings and variations to customize this cake to your liking. You can add chopped nuts such as walnuts or pecans for extra crunch, sprinkle shredded coconut on top for a tropical twist, or even layer in additional fruits such as strawberries or blueberries for added freshness and color. The possibilities are endless, so don’t hesitate to experiment and make this recipe your own!
No-Bake Banana Split Cake
No-Bake Banana Split Cake is a delightful, layered dessert that captures the classic flavors of a banana split in a convenient, no-bake format. It’s perfect for warm days when you want a sweet treat without turning on the oven.
Ingredients
For the crust:
- 2 cups graham cracker crumbs
- 1/2 cup (1 stick) unsalted butter, melted
For the filling:
- 16 ounces cream cheese, softened
- 1 1/2 cups powdered sugar
- 1 teaspoon vanilla extract
For the layers:
- 4 bananas, sliced
- 20 ounces crushed pineapple, well-drained
- 16 ounces strawberries, hulled and sliced
For the topping:
- 8 ounces whipped topping (Cool Whip)
- 1/2 cup chopped pecans or peanuts
- Chocolate syrup, for drizzling
- Maraschino cherries, for garnish
Instructions
-
Prepare the Crust:
- In a medium bowl, combine the graham cracker crumbs and melted butter until the crumbs are evenly moistened.
- Press the mixture firmly into the bottom of a 9×13-inch baking dish to form an even layer.
- Refrigerate the crust while preparing the filling.
-
Make the Cream Cheese Filling:
- In a large bowl, beat the softened cream cheese, powdered sugar, and vanilla extract with an electric mixer until smooth and creamy.
- Spread the cream cheese mixture evenly over the chilled graham cracker crust.
-
Assemble the Layers:
- Arrange the sliced bananas in a single layer over the cream cheese filling.
- Evenly spread the drained crushed pineapple over the banana layer.
- Add a layer of sliced strawberries on top of the pineapple.
-
Add the Topping:
- Gently spread the whipped topping over the fruit layers, covering the entire surface.
- Sprinkle the chopped nuts over the whipped topping.
- Drizzle chocolate syrup over the top.
- Garnish with maraschino cherries.
-
Chill and Serve:
- Cover the dessert and refrigerate for at least 4 hours, or overnight, to allow it to set.
- Serve chilled.
Notes
-
Ensure the crushed pineapple is well-drained to prevent the dessert from becoming too soggy.
-
For added flavor, consider toasting the nuts before sprinkling them on top.
-
This dessert can be customized with additional toppings such as caramel sauce or different types of nuts, according to your preference.

